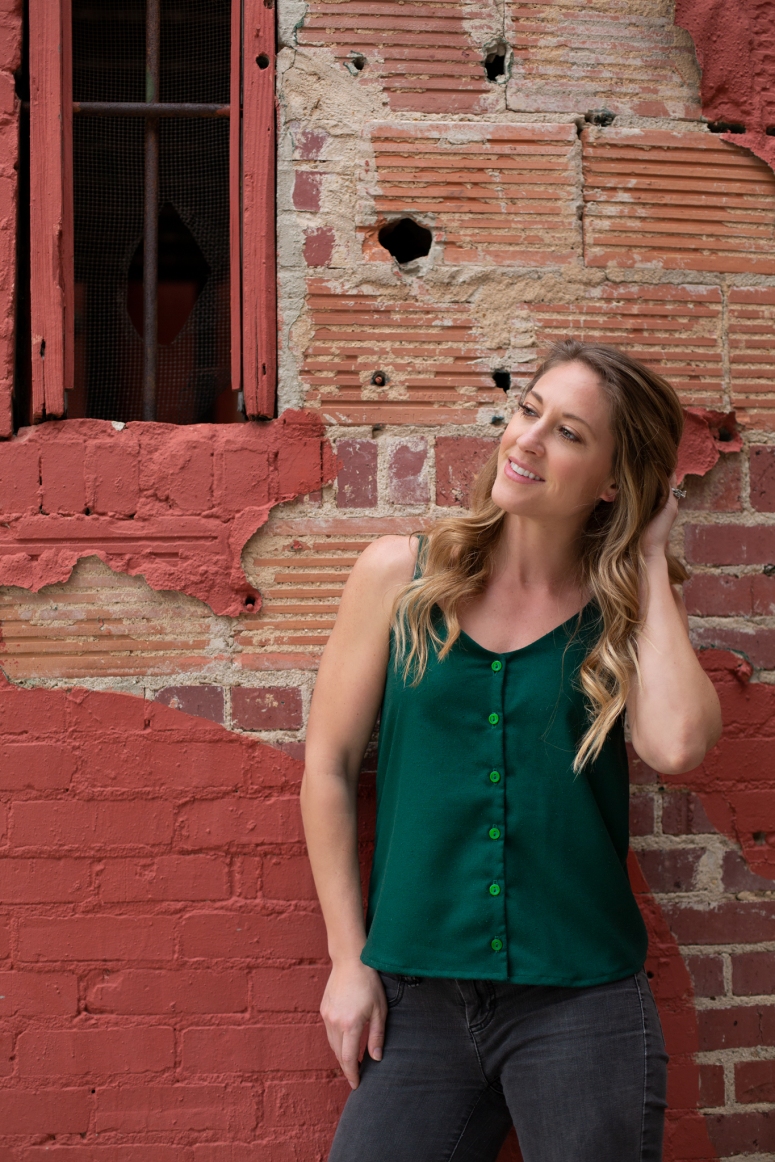
Round #2 of Ogden Cami hacks comin’ at ya! I swear someone else has already blogged this hack before but I wasn’t able to find a tutorial online…so forgive me if this has been done before now. If you missed the first post, head here to check out how to sew the criss cross detail!
You know I love a good pinterest-inspired look and so when I saw this photo, I had to re-create it with the Ogden cami! This inspired Hack #2, the button front!

Hack #2: The Button Front
This modification is a bit more in depth than the last but I also played around with the facing so that added some steps to the process. If you wanted to keep the facing the same, you can just skip right on over that part! Let’s sew this!!!
1. Extend your front piece 7/8″ beyond the center fold line. I came up with 7/8″ by accounting for the 1/2″ seam allowance that will be taken away when you sew the facing to the front, and 3/8″ for the overlap of the button placket (resulting in a 3/4″ wide button placket). If you wanted a wider placket, you can just add to the extension as desired. If you don’t, your cami will end up less wide across the front so be sure to take into account the overlap of the placket.

2. Repeat the same extension to the front facing. If you want to modify the facing to be a little more streamline continue with step 3. If you want to keep the facing as is, hop on down to step 4.
3. Modifying the Facing: I slimmed down the facing by creating a 1 1/2″ trace around the original facing piece. I did this for the front and back facing, but making a nice curve at the strap portion so that I could finish the raw edge with my serger. Sharp points and sergers don’t usually get along well.

When I adjusted the front facing, I basically just taped the extension of the front piece in step 1 to the new front facing. I really love you guys because I actually cut into my facing pieces and now I’ll have to reprint them for my next Ogden. That’s true love, y’all.

4. Sew the pattern as stated as you attach the front and back along the side seams and the front and back facing along the side seams. When you get to the step where you sew the main and facing together, you’ll follow the same process (leaving the back strap part open) but just continue down the front button placket extension.

NOTE: It will be much easier to get the back strap into the opening you left since the front is opened up. You’re welcome 😉
5. You can understitch just like the tutorial says to do, and continue this down the front facing/placket. Fold the facing back towards the inside of the cami. You can sew down the placket to secure the front facing if desired. Sew your buttonholes and buttons.
NOTE: You can tack the facing at the side seams as the tutorial states. I also tacked the facing down in the back with like 3 stitches to keep it from flipping up when I get dressed. It’s not noticeable from the outside, so feel free to do the same!
The Finished Look
This Ogden Cami was sewn from amazing Raw Silk Noil in Spruce from Blackbird Fabrics. I’m pretty much obsessed with the slubby texture and this shade of green is my fave!


I hope you loved this quick and easy button front modification tutorial for the Ogden Cami. Please let me know what you think in the comments! I’d love to see your Ogden if you make one using this tutorial! Be sure to tag me on Instagram the you post so I can share the love!

Hi! I am trying to understand how you ended up with a 3/4” placket. This is my first time trying to add a button placket to anything and the math is not making sense to me. If you have 7/8” on each front piece and then take away 1/2” on each of those you would end up with 3/8” on each front piece for the placket. But then those overlap to allow for buttons and button holes. So the placket would really be 3/8”… Right?
Sorry- I guess I should have worded it differently!! You will overlap for a 3/4” placket but each side has 3/8” of the placket…I hope that helps!